Ceiling Hoist Fixings and Considerations

In the thousands of installations OpeMed have completed, we have very rarely come across a project we could not create a fixing solution for. With over 20 years industry experience our specialists can ensure Ceiling Track is installed safely into every recommended installation. To help provide guidance and support, we have put together a quick explanation of the most common Ceiling Hoist fixings and considerations based on the type of ceiling structure present, we hope you will find useful.
Please remember every installation is different, the below are a few examples of many options available.
Wooden Joists
If fixed directly into Traditional Joists, the joists need to be at least 6inches by 2inches as this is the minimum that will retain it’s strength once drilled. (8inches by 2inches is preferred as the strength of the joist is in the height). If noggins are required they should be the same height as the joist, hung on hangers and cross screwed not nailed to the joist.
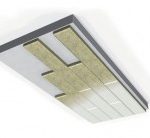
If there are joists smaller than those described above, we would recommend using Loft-Over Unistrut over the top of the joists with steel box channelling (40x40mm) and then span the weight load over three joists (Loft-Over Unistrut comes unpainted as is unseen).
In antithesis, a Loft-Under Unistrut is screwed underneath the joists (Loft-Under Unistrut comes is painted white and designed to fit into the ceiling).
Click here for image of painted Loft-Under Unistrut.
TGI Beams
TJI Beams are engineered wood joists, also known as an I-joist,. They are designed to eliminate problems that occur with conventional wood joists and are made of compressed sawdust and so cannot be drilled into.
A two stage fix is required.
First, the joists need to be strengthened (as per the pre-installation guidance) then two L-shaped brackets with Unistrut and a length of threaded rod coming down between.
Second, installing track and hoist fixed to the rod points.
Click here to download diagram or here to download example image.
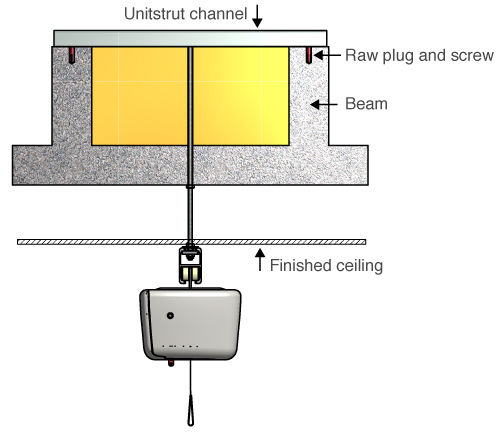
Block & Beam Concrete
Beam and block is a construction method to support flooring, especially for ground floors. It is made of cast concrete, one piece of which is an inverted T-shape beam, the other piece being a simple rectangular block.
The blocks are placed at regular intervals and the beams placed between them to form a connection between each block section. They form a support for the next layer of flooring materials.
Completed in a two stage fix –
First, the block and beam would normally be unistrut over. With the unistrut in place, the threaded rod can then be dropped down and normally would then be skreed over.
Second, the track and hoist is installed to the threaded rod points.
Click here to download diagram.

Solid Concrete Slabs
HILTI HKD Anchors are metal anchors that are drilled into the ceiling with a thread, our threaded rod is then fixed into anchors securing in place. There is often normally a void. If a void is more than 300mm then Lateral Bracing is needed to keep the track steady. Lateral Bracing is fixed to ceiling and then attached to threaded rod to eliminate track movement and add stability.

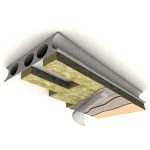
Hollow Core Concrete
A chemical fixing sleeve is used to fill the hollow centre. Our fixing is then pushed into the drying chemical to be secured in place.
There is often normally a void. If a void is more than 300mm then Lateral Bracing is needed to keep the track steady. Lateral Bracing is fixed to ceiling and then attached to threaded rod to eliminate track movement and add stability.
Wall Mounted/Wall Bracket
If you are using Wall Posts it will mean you cannot fix into the ceiling and you are looking to fix into a stud-work wall. Use of Wall Brackets occur when fixing to solid walls that will be able to bear the load.
Wall Posts allow for minimal fixing as all the load/force is directed down.
(Diagonal wall posts available).
Please remember every installation is different, the above are examples of the many options available.
*DISCLAIMER: For informative purposes only. Please always consult with your OpeMed Product Specialist when considering project fixings.
